(All buffs and debuffs last for 3 rounds unless otherwise specified.)
Sacrifical Stab
Range
Rank
Target
Damage
Accuracy
Crit mod
Effect
Self
Melee
+0%
85
13%
+40% Death Blow Chance vs Afflicted
Further levels
Level 2
Base
100
0
None
None
Level 3
Base
100
0
None
None
Level 4
Base
100
0
None
None
Level 5
Base
100
0
None
None
Sound
None
Abyssal Artillery
Range
Rank
Target
Damage
Accuracy
Crit mod
Effect
Self
Ranged
-33%
90
4%
Stress +8
Horror 8
Further levels
Level 2
Base
100
0
None
None
Level 3
Base
100
0
None
None
Level 4
Base
100
0
None
None
Level 5
Base
100
0
None
None
Sound
None
Weakening Curse
Range
Rank
Target
Damage
Accuracy
Crit mod
Effect
Self
Ranged
-75%
110
9%
-20% DMG (100% base) -20% PROT (100% base)
Stress +30
Further levels
Level 2
Base
100
0
None
None
Level 3
Base
100
0
None
None
Level 4
Base
100
0
None
None
Level 5
Base
100
0
None
None
Sound
None
Wyrd Reconstruction
Rank
Target
Heal
Effect
Self
0-24
Bleed (50% base) 3 pts/rd for 3 rds
Further levels
Level 2
0
None
None
Level 3
0
None
None
Level 4
0
None
None
Level 5
0
None
None
Sound
None
Vulnerability Hex
Range
Rank
Target
Damage
Accuracy
Crit mod
Effect
Self
Ranged
-90%
110
9%
Mark Target (3 rds) -20 DODGE (100% base)
Stress +30
Further levels
Level 2
Base
100
0
None
None
Level 3
Base
100
0
None
None
Level 4
Base
100
0
None
None
Level 5
Base
100
0
None
None
Sound
None
Stygian Embrace
Rank
Target
Heal
Effect
Self
1-2
Stealth (2 rds) +50% Stress dealt while Stealthed
Further levels
Level 2
0
None
None
Level 3
0
None
None
Level 4
0
None
None
Level 5
0
None
None
Sound
None
Limit:
3 Uses per Battle
Daemon's Pull
Range
Rank
Target
Damage
Accuracy
Crit mod
Effect
Self
Ranged
-50%
120
9%
Pull 2 (100% base)
Horror 10
Clear enemy Corpses
Further levels
Level 2
Base
100
0
None
None
Level 3
Base
100
0
None
None
Level 4
Base
100
0
None
None
Level 5
Base
100
0
None
None
Sound
None
Tactical Analysis[ | ]
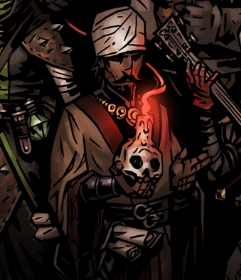
Using an Occultist[ | ]
Like before, the Occultist is a mixture of supporter and healer. With the changes to The Butcher's Circus, his dabbling in the eldritch allows him to inflict Stress and Horror on the enemies, which makes him a great inclusion to Stress teams.
His ranged attacks see a lot more use here - Abyssal Artillery tags the enemy backline with mild Stress and induces Horror along the way, while Eldritch Pull inflicts Horror and drags backline targets into melee range. Weakening Curse and Vulnerability Hex now inflict a whopping 30 Stress on top of debuffing, allowing an Occultist to drive an enemy into Affliction or force a lethal Heart attack. The choice of debuff will depend on your team - Weakening Curse is great for an attrition-focused battle while Vulnerability Hex sees use in Mark teams.
Wyrd Reconstruction returns as the gambling man's healing skill, but his Hands of the Abyss has been exchanged for Stygian Embrace. Stygian Embrace gives a much smaller heal but also gives its target the safety of Stealth and a large, temporary Stress infliction buff. It also has a use limit, so Wyrd Reconstruction often takes the slot. Sacrificial Stab is for use as an emergency melee attack should the Occultist be dragged forward, but it does have an impressive +40% Deathblow chance on anyone Afflicted, allowing him to deliver finishing blows easily.
Trinkets to be used with the Occultist are those that augment his Stress and improve the reliability of his healing. The Carnival Masque and Silver Syringe are easily accessible early on, and once unlocked, the Fleshbound Grimoire and Hand of Glory greatly improve the Occultist's Stress repertoire to torture the enemy backline. The Bleeding Skull ensures that Wyrd Reconstruction never rolls a 0 and also greatly improves the efficacy of Stygian Embrace, but the reduced Deathblow resistance debuff is a point of contention over its use. The Sacrificial Kris and Calling Saltes are to be used in a specialized Mark team, essentially turning his Sacrificial Stab into a Marking attack and letting him and his debuff skills also exploit Marks.
Fighting an Occultist[ | ]
As a healer with the potential to fully heal someone from Death's Door on top of some very powerful Stress sources, it is without question that the Occultist is a priority target. He has a very low Stun and Move resistance, though, so you can easily bring him out of the back to deny Pull and Artillery or lock him down with a timely Stun. Dazing the Occultist will also buy you time to finish him off before he gets a turn to heal himself.
Bear in mind that most teams with an Occultist would also have a secondary healer to compensate for the moments where he low-rolls with Wyrd Reconstruction. If you can put out enough damage you can essentially force both him and the secondary healer to waste turns on saving him before the inevitable Deathblow arrives.